QRPguys kits have excellent instructions, and as soon as it arrived I printed them from the website. I followed them precisely, checking off each component as it was inserted and soldered.
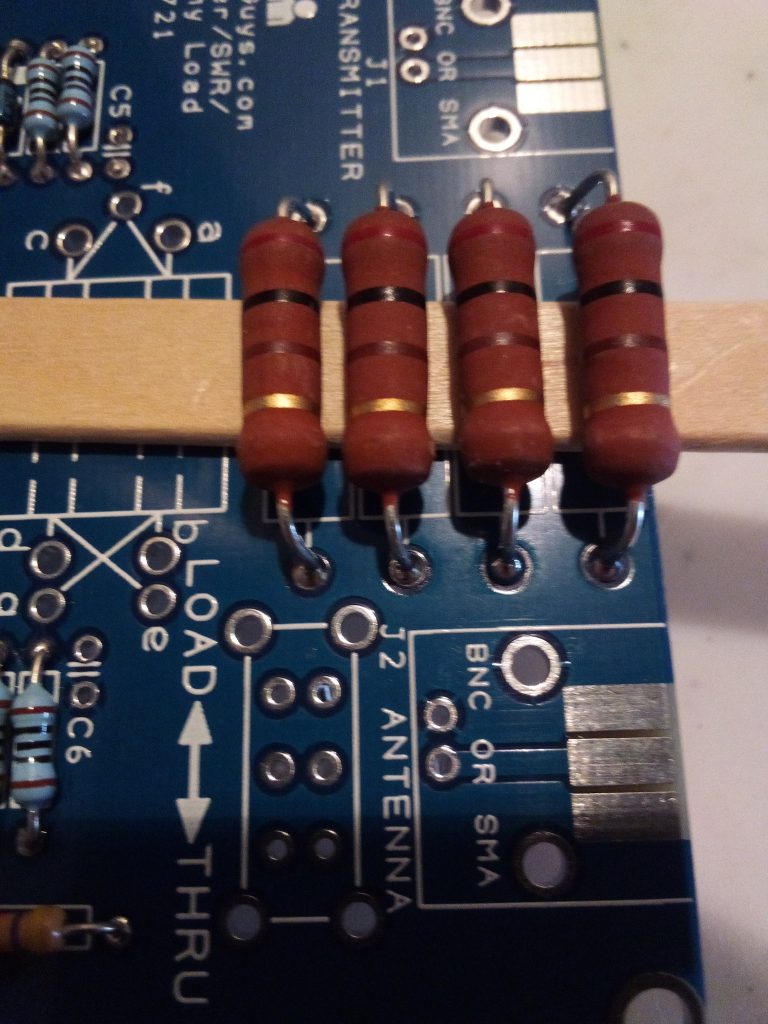
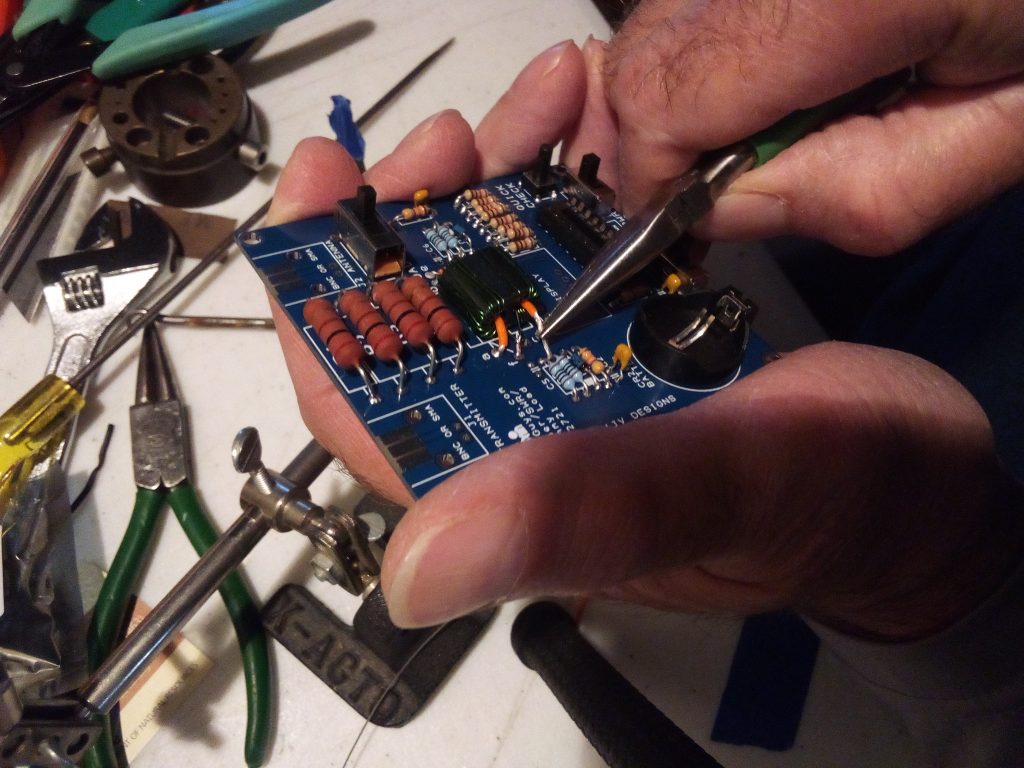
These four resistors form the dummy load. The instructions said to mount them above the board for better cooling air flow, so I used a popsicle stick as a spacer and a piece of masking tape to keep them in place when I turned the board over.
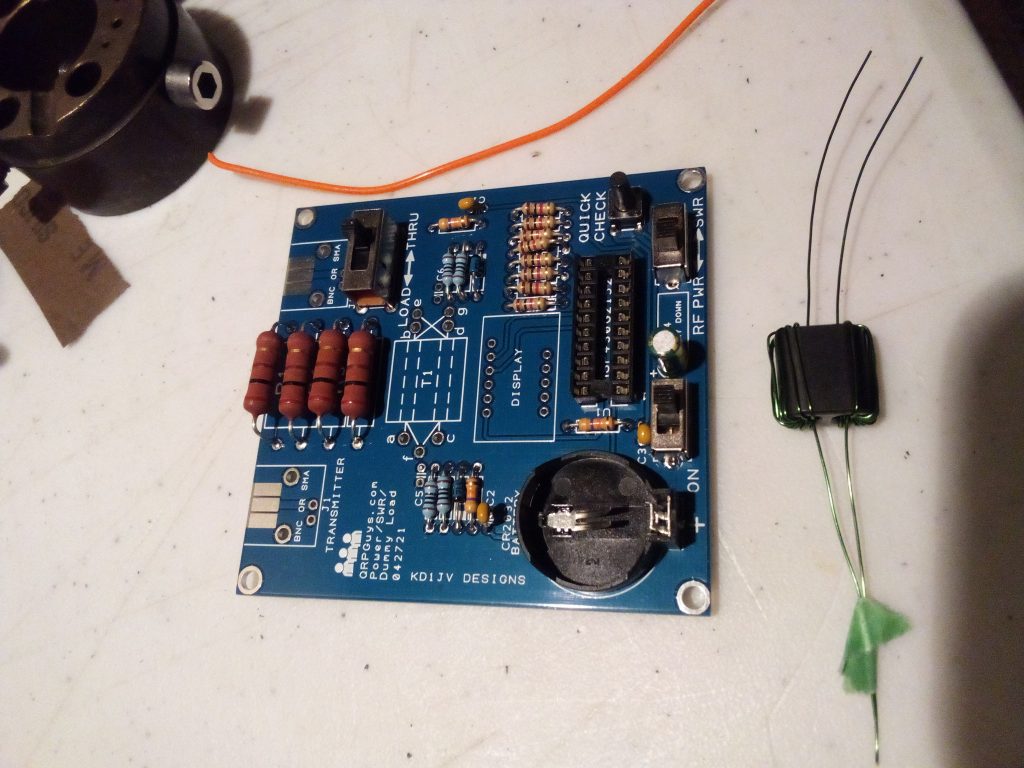
I made one minor error; placing c 4, a 100uf 16v electrolytic, vertically rather than flat against the board. It says “lay down” right on the board, but there it is.
Finally I came to the transformer that lies at the heart of the meter, wound on a binocular core:
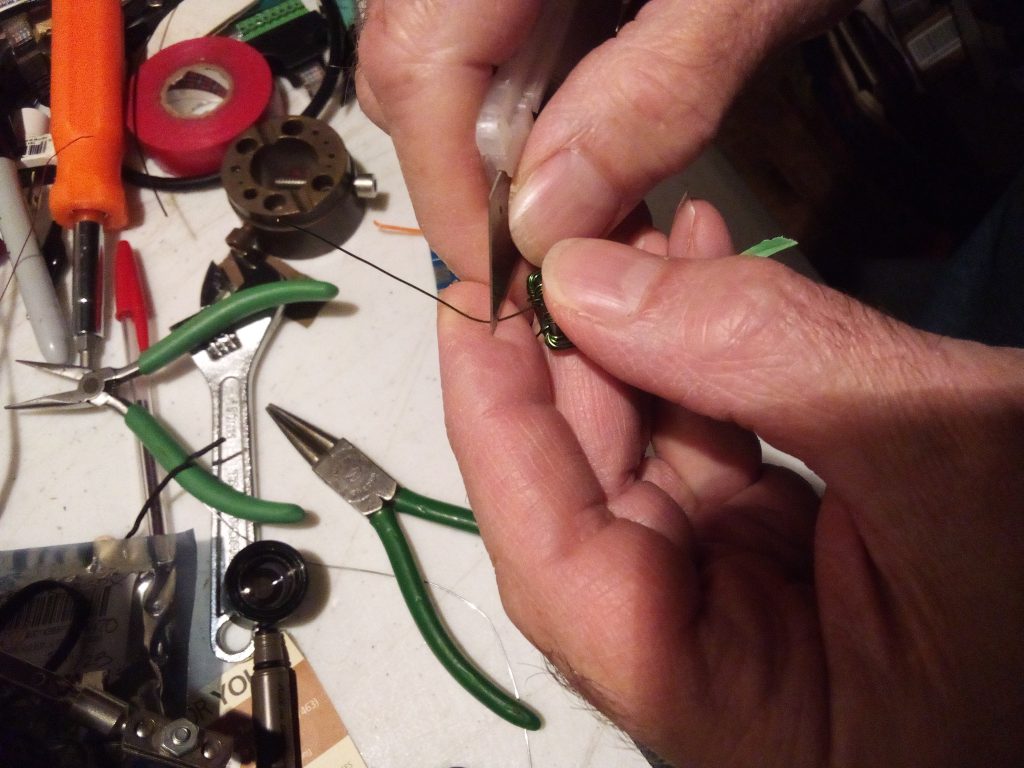
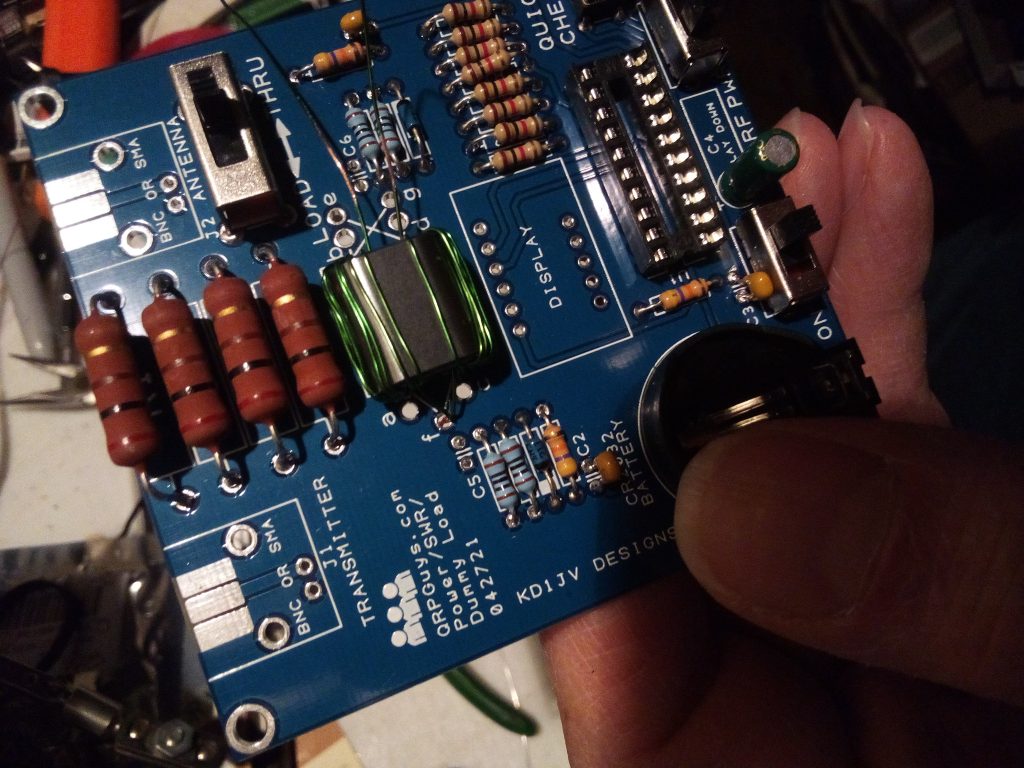
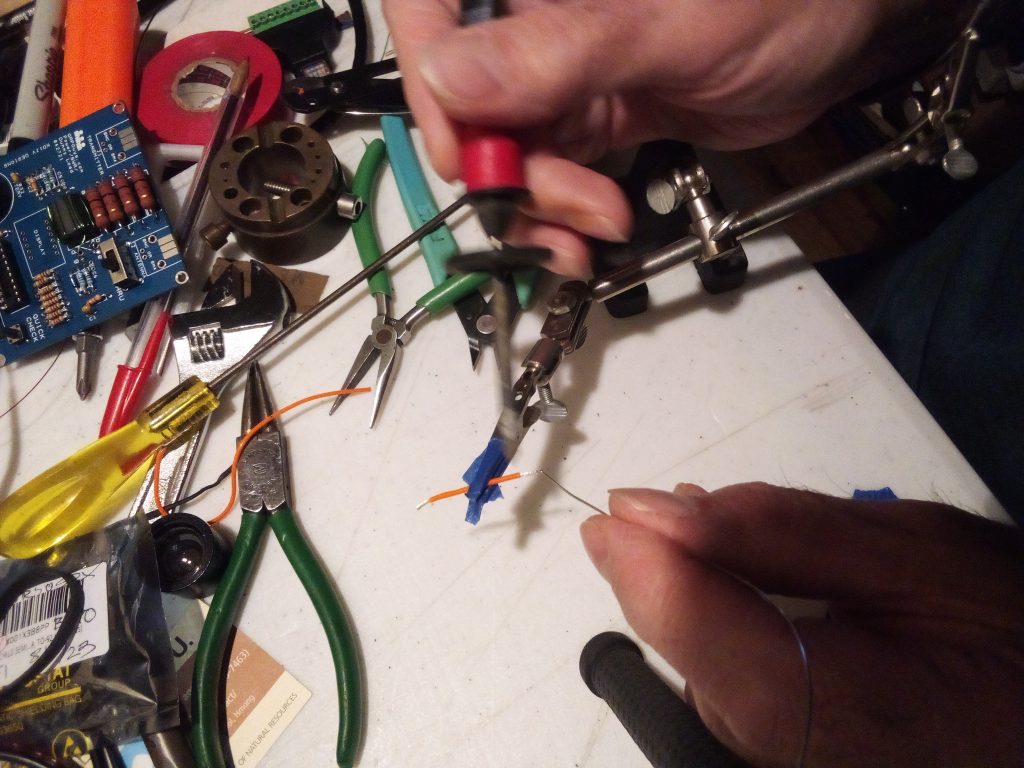
Twelve turns on either side was easy.I scraped the enamel insulation off the wires rather than burning it off with a soldering iron.The transformer, partly installed. At one end both leads go to a common point, at the other they cross over and go into separate holes. Next come the single turn primaries:The two primaries are formed from much heavier wire; stranded, with PTFE insulation, which is not as easy to strip as the more usual PVC. For ease of handling and insertion, I lightly tinned both ends after stripping.First I carefully inserted the prepared piece of wire through the core, then bent the end around and into the hole with long-nose pliers. Solder that end to keep it in place, then repeat on the other end. Repeat for the other primary.
Once that was finished, there were only a few parts remaining; two BNC connectors, the 7-segment LED display, and inserting the microcontroller chip. Install a 2032 battery and turn on the power; display shows — . — , which indicates “no input”, and is normal. Smoke test passed!
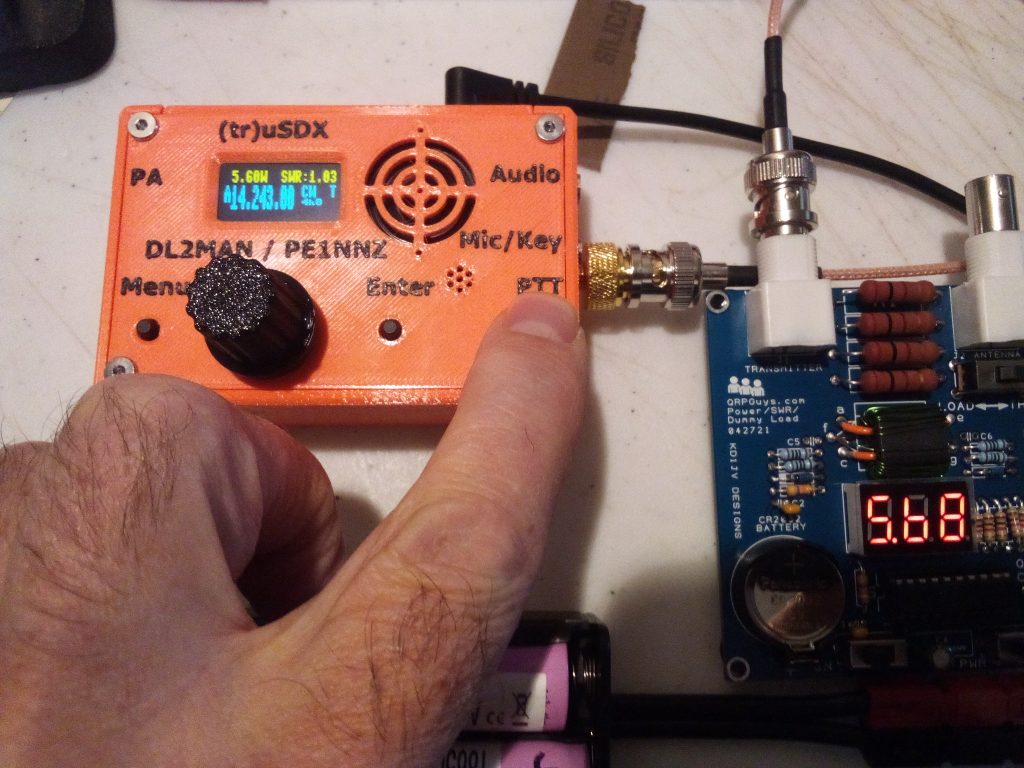
Now for a quick test of function! I got the (tr)uSDX with its battery pack and a BNC jumper, ran through the radio’s function menu, and tried it out:
5.60 watts indicated on the (tr)uSDX, 5.68 on the meter. I tried it several times; each time the offset was +.07 or .08, or a bit less than 2% difference between the two. This seems close enough to go on with! I may get out the Bird wattmeter and do a referee test sometime to determine where this minor difference arises. Both meters read a 1:1 SWR into the dummy load, as expected.
Looking forward to taking both of these devices into the field for an activation soon!
Thanks for visiting driftlessqrp.com! Bookmark this site and come back soon!
One response to “Building the QRPGuys Digital Power/SWR Meter w/Dummy Load”
Appliance Repair Manual
Its such as you learn my mind! You appear to grasp so much approximately this, such as you wrote the guide in it or something. I believe that you simply could do with a few p.c. to force the message home a bit, but instead of that, that is great blog. An excellent read. I will certainly be back.
Comments
One response to “Building the QRPGuys Digital Power/SWR Meter w/Dummy Load”
Its such as you learn my mind! You appear to grasp so much approximately this, such as you wrote the guide in it or something. I believe that you simply could do with a few p.c. to force the message home a bit, but instead of that, that is great blog. An excellent read. I will certainly be back.